前言
’’’
作者: hon20002000
最後更新: 2019/9/23
‘’’
本教程是為了讓同學們快速體驗機器學習/深度學習而設計的.
學習本教程須先了解python基本語法, 例如list, dict, numpy切片等等.
教程用法:
閱讀本blog上的基礎語法
完成每篇文章的作業
部分學習所需的檔案在github下載
遇到問題或其他改善建議可在下面留言
正文
本節介紹用test_data評估model效能
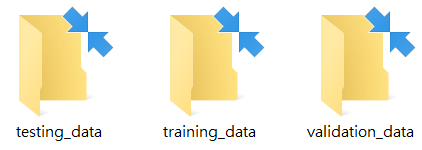
一般最簡單的分法, 會分為training_data, validation_data, testint_data

Training_data是為了訓練model, validation_data是為了評估訓練後的model
背後的原理是利用一堆參數去模擬出一條數學公式來表達分類模型
原則上是”記憶”數據, 用此training_data的accuracy = 99%也是沒有意義的
因為它只表示你已經完全”記憶”了training_data裡的相片集
validation原則上是和training分開的, 即訓練時不會用到validation_data
那麼validation的accuracy原則上是很有代表性的, 但實際上郤不是
由於cross_validation方法的使用, training_data和validation_data實際上已混合了
在經過多次訓練後, model也”記憶”了validation_data
所以validation是有指導作用, 但也不能說val_acc=99%就非常好
只能說val_acc很低的話, model根本完全不合格
在此情況下, test_data就很重要了
test_data原則上是只能使用1次, training_data是完全沒有裡面的相片的
而且test_data必須具有代表性, 即test_data的相片集已經能代表絕大部分model要面對的情形
所以test_data的質素是關鍵, 若test_data的test_acc = 90%up
那麼在任意情況下, 其他真實相片集得出的acc也應該在90%左右
實際情況下我們的test_data會使用多次, 因為沒有人力一直更換test_data
但我們應該避免根據test_data的結果來修正參數, 否則便會”記憶”了test_data
test_data便會作廢了, 需要重新再次收集新的test_data
最簡單地解決train_acc及val_acc很高, 但test_acc很低的方法如下:
方法的重要程度順序排列:
(1)training_data的相片和test_data接近, 我們不是要收集世上所有類型的signs
而是要收集和test_data接近的相片集, 那麼model的預測能力才會合理
比例也是一個容易忽略的因素
若估算出test_data的A:B:C = 1:2:3, 那麼training_data的A:B:C = 1:2:3
將會是最優化的處理
(2)若已收集大量的圖片, 那麼加深加大模型是一個最直接提升效能的方法
(3)嘗試不同的optimizer
(4)使用不同的正則化技巧, BatchNormalization, dropout..etc
(5)觀察Loss及acc曲線所隱藏的統計學訊息
更深入的原理在下面的鏈結, 這是機器學習大師andrew ng所寫的一本秘笈(中文):
https://deeplearning-ai.github.io/machine-learning-yearning-cn/docs/home/

下面直接介紹test_data的eval.py
概念流程:
載入model.h5
生成img_list及dict
把圖片resize成150x150
把data reshape成 x = x.reshape(1,150,150,3), 才能用model.predict(x)
y = model.predict(x)
if label == ans, scores+1, 準確率acc = scores / len(data)
1
2
3
4
5
6
7
8
9
10
11
12
13
14
15
16
17
18
19
20
21
22
23
24
25
26
27
28
29
30
31
32
33
34
35
36
37
38
39
40
41
42
43
44
45
46
47
48
49
50
51
52
53
54
55
56
57
58
59
60
61
62
63
64
65
66
67
68
69
70
71
72
73
74
75
76
77
78
79
80
81
82
83
84
import os, cv2, random
import numpy as np
from keras.preprocessing.image import ImageDataGenerator
from keras.preprocessing.image import img_to_array, load_img,array_to_img
from keras import layers, models, optimizers
from keras import backend as K
from keras.utils import np_utils
from sklearn.model_selection import train_test_split
from sklearn.metrics import confusion_matrix
from keras.layers import Conv2D, Activation, Dropout, MaxPooling2D, MaxPool2D, Flatten, Dense, BatchNormalization
from keras.models import Sequential
import matplotlib.pyplot as plt
#from keras.optimizers import Adam
from keras.models import load_model
#import matplotlib.image as mpimg
#import h5py
#from sklearn.preprocessing import LabelBinarizer
import time
from sklearn.metrics import confusion_matrix
import seaborn as sn

def prepare_test_label(img_path):
    classes_120_dict_to_save = {}
    img_list = []
    path = img_path
    files = os.listdir(path)    #files = ['test_data']
    #print(files)
    for file in files:
        filepath = path+ "/" + file    #filepath = test_data/test_data
        #print("filepath:", filepath)
        filenames = os.listdir(filepath)    #filenames = ['1','2','3',...'120']
        #print("filenames:", filenames)
        for filename in filenames:
            img_filename = filepath + "/" + filename
            #print("img_filenames:", img_filename)
            img_paths = os.listdir(img_filename)
            for img_path in img_paths:
                pic_path = img_filename + "/" + img_path
                img_name = pic_path   # dict: {'test_data/test_data/89/IMG_8695.JPG': 89, ...}
                classes_120_img_label = int(filename)    #label = 1-120
                img_list.append(img_name)
                classes_120_dict_to_save[img_name] = classes_120_img_label
                #print("classes_120_dict_to_save:", classes_120_dict_to_save)

    return img_list, classes_120_dict_to_save

classes_120_scores = 0
model1_path = 'CNN_for_submit_7_20_16_53_sign96816.h5'      #載入model
model1 = load_model(model1_path)

img_list, classes_120_dict_to_save = prepare_test_label('test_data')     #生成img_list和dict

label_ans = [[] for i in range(121)]
ans_label = [[] for i in range(121)]


for img_path in img_list:
    x = (cv2.resize(cv2.imread(img_path), (150,150), interpolation=cv2.INTER_CUBIC))
    x = x.reshape(1,150,150,3)      #reshape成4維是必須的, 因為model.predict需要4維數據
    #x = x/255.0     #若訓練model時使用了rescale, 這裡才要rescale
    classes_120_label = classes_120_dict_to_save[img_path]

    y = model1.predict(x)
    y = list(y[0])
    max_value = max(y)
    ans = y.index(max_value)
    label_ans[classes_120_label].append(ans)
    ans_label[ans].append(classes_120_label)

    if ans == classes_120_label:
        classes_120_scores +=1

for i in range(121):
    scores = 0
    percentage = 0
    for element in label_ans[i]:
        if element == i:
            scores +=1
    if len(label_ans[i]) != 0:
        percentage = 100*scores / len(label_ans[i])
        print("percentage:{}%, scores/label: [{},{}]".format(percentage, scores, len(label_ans[i])), "label_ans{}:".format(i), label_ans[i])
print("---------------")

print("120 classes classify: acc:{:.2f}%".format(100*classes_120_scores/len(img_list)))
練習
(1)成功運行eval檔